I had hoped to get this post up yesterday but after 3 or so hours of intense hand sewing my eyes jut weren't up to looking at the computer. So here we go....
I found this pattern, Advance 4463, on eBay earlier this year and was so taken by the design features I just had to have it. The only drawback was there were no instructions. Being the sort of person who doesn't tend to follow instructions anyway, I wasn't deterred.
 |
| Advance 4463, 1940s day dress. |
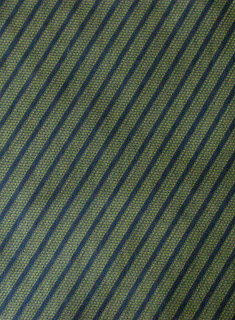
The perfect material presented itself a month or so later in a Spotlight store, a heavy cotton of navy with green stripes made up of tiny dots. It is actually quilting fabric and was only $3 per metre so if it didn't work I hadn't lost out too badly.
Construction of this dress was surprisingly easy. I used the image on the front and line drawings on the back of the pattern envelope as a reference and just went for it. I did, however, encounter a couple of problems; I had real trouble getting the points on the bodice square, I think I sewed & unpicked three times and had to settle with the last pass because the fabric had frayed too much. The other problem wasn't skill based, it turns out there is an error on the back of the envelope.
The problem is with joining the shoulder front section to the blouse. According to the line drawing, sides numbered 3 & 4 should be matched and sewn, but if you follow this the top shoulder seam heads up at an odd angle, rather than lying straight. As usual, I sat and looked at the fabric pieces, turning them round and round, trying to figure out exactly how it would work and I just couldn't see it. Thank the Gods for Mdblm!! He pointed out if I pieced it together as suggested, my lines (on the fabric) would be heading in the wrong direction. It was obvious when pointed out but I'm not one for thinking outside the box. The solution: turn piece C 90 degrees counter-clockwise (sew shoulder section side #4 to blouse front section side #3). Sorry if this makes no sense, I couldn't work out how to draw it onto the diagram.
The hours of hand sewing done on this dress mainly involved the button holes. For some irrational reason I have a real fear of button holes. It's silly really, my machine does the stitch but it's not automated so I have to judge the size as I sew. I've not had much success in the past and my fears were holding me up so I decided to sew them by hand. While they were very time consuming, I'm pleased with the result; they're nice & neat and I had much more control over the size.
 |
The tacked shape of button hole |
 |
| Hand sewing in action, reminiscent of my recent embroidery attempt |
And here's the finished article...
 |
| Dress worn with belt as suggested on envelope, I'm not sure I like it. |
 |
| Catching the last rays of the day.... |
I really like how this dress turned out and it's so comfortable I'll likely get a lot of wear out of it when the warmer weather finally gets here. Not to mention I've managed to get all the lines to match up this time. Woohoo!!
So tell me dear readers, are you a stickler for instructions or do you prefer to sew by feel? I'd love to hear your thoughts.
- Tamara


Great dress. I don't always use the instructions, but have been caught out many times when I didn't, so still often glance over them at least.
ReplyDeleteI think it really looks lovely on you! And the subtle stripe (well, subtle from a distance I suppose) looks really interesting with the bodice construction.
ReplyDeleteI'm with you on buttoholes, my machine has a 4-step process and it's still possible to make them look a bit crappy.
The dress looks great. I agree, without the belt is better.
ReplyDeleteI still look at instructions cos I've only been sewing since the beginning of this year. Though it's getting to where I dont need them for things like darts, side seams and waistlines - unless the dress has some peculiar elements.
ReplyDeleteAnd often, the internet is more helpful than my pattern instructions as you know how vague those vintage ones get!
This dress looks great on you! I love that colour. And the belt works I think :-)